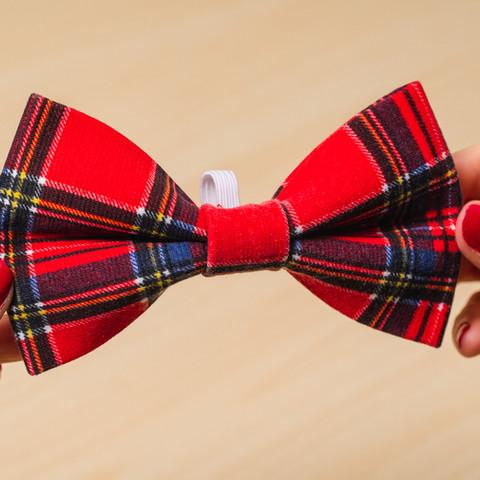
DIY Dog Bow Tie
- Mar 25, 2020
- 3 min read
Updated: Feb 16
Get creative and make your dog a stylish bow tie!


What You Need
Fabric
Thread + needle
Elastic
Scissors
Iron
Pattern (Download below)

Difficulty Level: Beginner
Instructions
Gather your supplies, clear a space and set up your iron and ironing board.
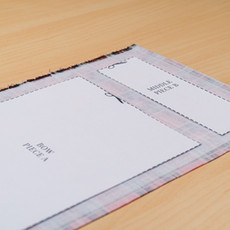
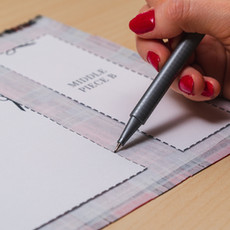
1. Print and cut out your paper pattern with scissors and set aside. (If you don't have a printer, skip this section and you can measure out the pieces directly onto the fabric later)


2. Lay the fusing onto the wrong side of the fabric - the shiny side has the glue so thats the side that touches the fabric. (make sure to trim any edges of the fusing so it doesn't stick to your iron!)


3. Start on a medium/low heat, and increase heat as required. Iron slowly from one side to the other until the fusing has bonded onto the fabric. This stiffens the fabric and will help your bow tie remain a great shape!


4. Lay your patterns onto your fabric and cut out each piece, if you don't have any pins, draw around the pattern with pen. You will have a larger piece A, and a smaller piece B.
(if you can't print the pattern, measure out 10" by 6" for piece A and 6" by 2" for piece B)


5. Start with piece A – this is the larger piece that makes the bow. Fold piece A in half and iron, this will create a crease down the centre which will help you for the next step, open up your fabric and lay flat.


6. Fold in each side of the fabric into the centre crease, and iron flat.


7. Now fold the piece in half the other way and iron to make a centre crease, open back up.


8. Fold in each side to the centre, and iron flat.


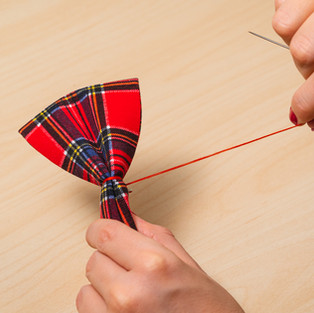
9. Thread your needle and tie a knot in the end so it's ready. The part can be quite fiddly so you might need to experiment a bit. Pinch the bow together with your thumb, index and middle fingers, and create a bow shape.


10. Thread your needle through all layers and go back and forth a few times securing the shape, wrap the thread around the middle a few times and then tie a knot in the end.


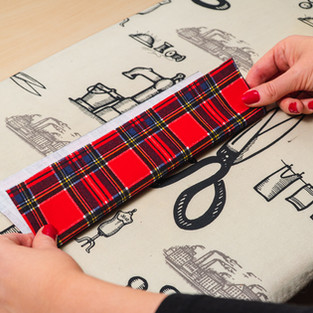
11. Grab fabric piece B and lay this out, fold both sides of the fabric over each other, into approximately 3rds. Iron flat so the strip remains shape. It doesn't matter too much how you do this, as long as you have a strip of fabric which is approx 1" wide.


12. Secure one end of the fabric to the bow with your needle and thread. Now you will wrap piece B around the centre of your bow, again you can experiment and do it as tightly as you like. Trim off the remaining fabric.


13. Sew and secure the middle piece around the bow - don't worry about it looking perfect, you won't see this bit!


14. Fold your elastic in half and mark the width of your dogs collar, stitch a line across the elastic. You should be able to thread the collar through the loop, so it is very snug and secure. Cut off the end of the elastic leaving around 1cm from the stitch line.


15. Open up the end of the elastic and place either side on the middle of the bow. Sew both sides to the fabric.


16. Thats it! You have created your own bow tie for your furry friend. Take a picture of your dog wearing the bow tie and share with us, we can't wait to see your creations!

If you have enjoyed this tutorial please consider leaving a donation here to Blue Cross!
Always supervise your pet when wearing the bow tie, never leave them alone wearing it, if your pet appears to be uncomfortable wearing the bow remove immediately.
You may find links to supplies to help you with this tutorial. As an Amazon Associate I earn from qualifying purchases.


